
Showing posts with label Summer. Show all posts
Showing posts with label Summer. Show all posts
Tuesday, July 8, 2014
Salted Caramel Blondies
First things first, sorry I did not have a new recipe for you guys last week. I have just been so dang busy! Also, it is difficult to bake in 100 degree heat, especially because the oven makes it even hotter! Well, today was a bit windy so I decided to do some baking, but then the heat picked up so I spent as little time in the kitchen as possible. Nonetheless, I still have a great recipe to share with you guys today!
Wednesday, June 25, 2014
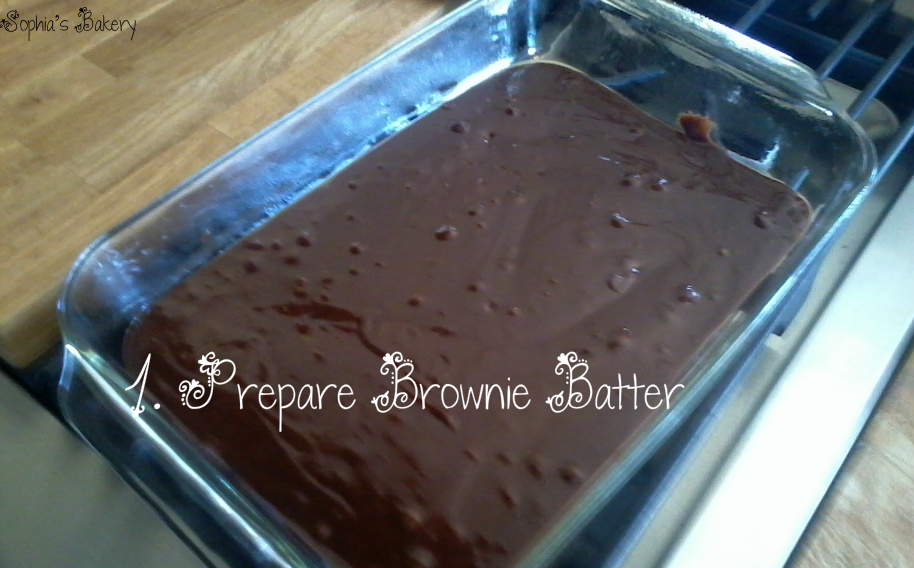
S'mores Brownies
As a popular camping dessert, why not bring the s'mores to the kitchen? Sure, there are a heckuva lot of s'mores recipes, but I would say this one is by far the best. It has the sweetness of the chocolate, the crunch of the graham crackers, and even the gooey-ness of the marshmallows! And, knowing me, I looove me some marshmallows! An added bonus to this recipe is that is another of the easy 1-2-3's that are loved by the whole family!

Thursday, September 26, 2013
Scraps Cookies
Alright, so these cookies definitely have many names. The can be called Garbage Cookies or Everything but the kitchen sink, as well as a 'nicer' and 'cleaner' name, Scrap Cookies. They get their name from there ingredients, which really can be anything. I mean, this is the cookie where you can put in any leftover ingredients from previous baking jobs, and it will still taste fabulous! There is definitely no set recipe for this past the actual dough preparation, so go ahead and be creative!
I originally received this recipe through a client of mine. Over the summer I catered for the first leg of her daughters Bat Mitzpha, and she provided the recipes. I also prepared lemon bars, carmelita bars, and my favorite, M&M cookies. All were fabulous, and the job ended well! Now these recipes sit in my notebook, waiting to again be picked up and shared to the goodness of the world. Hang on people, you will see them soon!


I originally received this recipe through a client of mine. Over the summer I catered for the first leg of her daughters Bat Mitzpha, and she provided the recipes. I also prepared lemon bars, carmelita bars, and my favorite, M&M cookies. All were fabulous, and the job ended well! Now these recipes sit in my notebook, waiting to again be picked up and shared to the goodness of the world. Hang on people, you will see them soon!

These are the ingredients I blended into my batter. As you can see, I have: pretzels, oats, coconut, craisins, assorted nuts, and chocolate chips. You can also add in Rice Krispies cereal for a bit of crunch, or a specific nut if you only like certain kinds. And each of these ingredients are easily removable as well, especially since not everyone always like whats in a certain cookie. It's also easy to mix in any other items you can find laying around the kitchen, waiting to be used, so be creative! Oooh you can even make a Candy Scraps cookie with little candy pieces I might have to try that for Halloween, so be on the lookout for a recipe!

Then, after you combine the ingredients with the dough, drop them onto an un-greased baking sheet. You can roll them into balls if you like, these are one of the cookies that actually holds their shape while baking. Either way, these cookies will come out fluffy and full of flavor once out of the oven. Mmmmm, they are best right out of the oven, when everything is still gooey and falling apart! Yum!

RECIPE:
INGREDIENTS:
1 cup Shortening (or Margarine)
1 cup Brown Sugar
2 Eggs
1 tsp Vanilla
2 cups Flour
1 tsp Baking Soda
1/2 tsp Baking Powder
1 tsp Salt
2 cups Oatmeal
1 cup Coconut, shredded
1/4 cup Assorted Nuts
12 oz bag Chocolate Chips
1 cup Craisins
1/4 cup Pretzels
Instructions:
1. Preheat oven to 350 degrees F.
2. In a large bowl, mix together the shortening, brown sugar, eggs, and vanilla. Set aside.
3. In a medium bowl, mix up the remaining ingredients. Then combine with the dough and mix until everything is well incorporated.
4. Drop balls of prepared dough onto an un-greased baking pan, then cook for 10-15 minutes, or until the edges have a golden brown color. Cool and enjoy!
Try this recipe? Tell me how it went down below in the comments!
Saturday, August 17, 2013
Apple Crisp
 Alright, peach season is over...time to bring on the apples! Every year my family and I go up to apple hill to get apples to can them! And boy is homemade applesauce yummy! The whole process is fun too!!
But this isn't what I made this fine summer night! We actually had some store-bought apples that nobody ate, so Laurie cooked them. Then she asked me to pull out our old Betty Crocker Cookbook (picture edition, 1956) to see if there was a crunchy recipe we could put the apples under/over. Well, just my luck, I found this wonderful apple crisp recipe!
And let me tell you, it is absolutely amazing! Very easy too!! Now, Laurie had already cooked the apples with some cinnamon, sugar, and nutmeg, but if you would rather not cook them you can just place them in the baking dish. That is what you should do in the original recipe, which I will place down below. But, if you wanted to flavor your apples, just cook them in a pot with some sugar, cinnamon, and nutmeg!

Here are the apples, all nicely cooked! But, if you don't have a lot time or would rather un-flavor the apples, just cut them up and put them in the baking dish. Make sure you peel and core the apples, as well as cut them up. Both slices and cubed apples work fine, it is purely based on preference.

Then, you will make the topping! Just mix the brown sugar, flour, oats, cinnamon, nutmeg, and butter into a medium sized bowl until crumbly. This is where the crispy top comes from! It is very simple, and almost a fail-proof recipe. I mean, someone out there might find a way to mess it up, and I would congratulate them. Just kidding, I'm not that mean!

Then you will want to crumble the mixture onto the top of your apples. It doesn't have to be perfect! And, seriously, before and after you bake it the topping will look the same!! The only way you can tell that it is done is if the topping is more of a golden brown color, and is crispy and hard-ish. I mean, if it was completely hard it might just be burnt and burnt doesn't taste so good!
But, stick this in the oven and let it cook for a while. And when I mean a while, I mean you can watch your favorite tv show, clean the kitchen, or even make a dinner! It will take a while for this to bake to perfection! And oh my goodness does this make the house smell amazing! This is definitely one of those desserts you wouldn't mind smelling forever!
Then, viola, it is done! This dessert is best served warm, and a little side of ice cream won't hurt either! If it isn't eaten right away, you can put some saran wrap over it and store it on the counter, it doesn't need to be refrigerated But, if storing, don't do it for more than a couple of days, because then the topping will get soggy and a little gross. EW!

Recipe:
4 Apples; peeled, cored, and sliced
2/3-3/4 c Brown Sugar
1/2 c All Purpose Flour
1/2 c Rolled Oats (Quaker Oats are fine)
3/4 tsp Cinnamon
3/4 tsp Nutmeg
1/3 c Butter, softened
1. Preheat oven to 350˚ and grease an 8" pan (either square or round works).
2. Place the sliced apples in the baking dish, set aside for now.
3. In a medium sized bowl, mix together the rest of the ingredients until it has a nice crumbly texture to it. Crumble over the apples.
4. Place dish in oven and bake 30-35 minutes, or until the topping is golden brown with a crispy texture. Serve warm for best results.
Try this recipe? Tell me how it went down below in the comments!
Tuesday, August 6, 2013
Fresh Peach Crisp
 And peach season continues! My family finally wanted something different from the Peach Cobbler I keep making, so I decided to try another recipe. Dessert, of course! This recipe has a crispier top, and can be made with no oats of any kind. It's amazing how flour and sugar can make a crispy topping! Now, this is also the part where I tell you where I got the recipe from, but I have had it for so long that I lost the original source. Bummer! You know, it actually might have come out of one of my old Betty Crocker cook books, man those are reliable! Anyways, I used up the remaining peaches (finally!) to make this recipe, and my family is definitely happy for the change! Well, it is the same taste, but a little variations are all they need to keep happy!
 Well, I only had 3 1/2 peaches left, and I put them to good use! You are going to want to skin them and slice them into thin pieces (like shown). Then you will place them in a 9.5in round pan, and make sure they evenly coat the bottom. Mix in the water and lemon juice to coat the peaches. That mixture will help the peaches from tasting too sweet, and to help retain from changing colors as well.
Then you will want to mix together the flour, sugar, and butter until you have a nice crumbly mixture. You will then crumble this mixture over your peaches. The crumblier the dough is, the crisp-er your Crisp will be!

So, pop that sucker in the oven, an let it sit for a long time! During this time you can go watch TV or paint your nails or something, this will need the time to form itself into the lovely dessert it is.

Then go ahead and eat your crisp! It tastes best warm, and you can even serve it with some vanilla ice cream. Mmmmm ice cream! Enjoy your Crisp!!

Recipe:
4-5 Peaches, peeled
1/4 cup Water
1 tablespoon Lemon Juice
1/2 cup White Sugar
1/2 cup Butter, softened
3/4 cup Flour
1. Preheat oven to 350˚. Slice your peaches thinly, or dice them if you prefer them that way. Place them in an un-greased 9.5 inch round cake pan. Add in the water and lemon juice, and mix it until the peaches are coated evenly.
2. In a medium sized bowl, mix the flour, sugar, and butter until crumbly mixture is formed. Crumble over peaches.
3. Bake 30-40 minutes, or until the crumble is crisp and has a golden-brown color to it. Serve warm for best results.
Peach season is almost over, get ready for apple season coming up soon!
Try this recipe? Tell me how it went below in the comments!
Sunday, August 4, 2013
Easy Caramel Apples
 So, every once in a while Laurie will find a recipe on the internet that she wouldd like me to make. And, knowing that I love to try new things, I do it! laurie tends to see recipes that are trending on the internet, recipes I see but give no thought to. I mean, Pinterest has a whole page dedicated to this recipe, yet it is hard to actually find written directions on how to make caramel apple slices! And if you have yet to see this recipe, this is basically what it is, no directions or links at all:
Yeah, annoying right? Almost as annoying as this keyboard(which lags, then makes my words run together. Which means I have to spend extra time going back and making sure everything looks okay). Anyways, the picture above shows that you hollow out your apples, melt down some caramel sauce, and pour it in your apples. What it doesn't say is: how long to melt the caramel, when to put it in the apples, and the fact that you have to refrigerate them first to set the melted caramel. I mean, how could you get all that from one picture? You can't.
So, once again I created my own little recipe, one that does make sense! And it is only two steps! Too easy, right? They literally take 10 minutes to take(mostly coring the apples) and 20 minutes to set. And they taste sooooo good! I mean, if my dad is eating them they must be good(he never eats what I bake, so it makes me excited when he does)! And I only used two apples since there are three of us, but it is definitely enough!
 First, carve your apples! You can use any type of apple you want, but I just used these green ones since that is what traditional caramel apples are made with! But, any kind will do. You can carve out as much or as little as you would like, it all depends on how you like your apple to caramel ratio.
You can either eat the apples "innards" or get rid of them. At my house, the chickens get them! They eat a lot of apples in the fall too, when canning season comes along! Heck, even my dogs love apples and apple skins!!
 Next, you are going to want to fill your apples with caramel. I just used this caramel that I had leftover from a catering gig I had at the beginning of summer. I only had 1/2 the jar left, which barely filled my two apples. I would say that a full jar would probably give you 3-4 apples.
Then you would just refrigerate the apples for 20 minutes. cut them into individual slices, and enjoy!

Recipe:
2 apples, cored but not peeled
8 oz Caramel sauce, any
1. Cut your apples in half and scoop out the middle. This can be done with a spoon.
2. Pour caramel into apple halves. Refrigerate for 20min-1hr or until caramel has set.
3. Slice and enjoy!
Try this recipe? tell me how it went below in the comments!
Wednesday, July 31, 2013
Brownie-Cookie Bars
 Here I am, baking again! Actually, that shouldn't really surprise anyone, I love to bake. Baking is my one get away from reality, when I don't have any new books to read. I also felt like my father should get a sweet treat after his long flight home from India, and what a sweet treat this is! I actually did not follow a recipe time, I just threw two things together and hoped for the best. I have made Brownie-Cookie Dough Bars, so it is basically the same idea. And, I'll admit, I did use a box brownie mix, and only because my attempts at making brownies from scratch failed. Multiple times. They just come out too crumby! Besides, I am all out of cocoa powder from make the brownie in a mug for my sister, Macy. Boy does she love those!

Bake for 40 minutes and viola! You have made yourself some amazing brownies!

Recipe:
1 box Brownie Mix, prepared
1 box Cookie Mix, prepared
1. Preheat oven to 350˚ and grease a 9x13 pan. You can also line with parchment paper
2. Spread the prepared brownie batter so that it is evenly distributed within the pan. Then drop spoonfuls of the prepared cookie dough on top.
3. Bake for 40 minutes or until a toothpick comes out clean.
* Cool completely before cutting*
What did I do with the remaining cookie dough? Make cookies of course! Just follow baking instructions for the cookies, which normally cook for 8-10 minutes.
Try this recipe? Comment down below and tell me how it went!
Monday, July 29, 2013
Southern Peach Cobbler
One thing about living in my house is that there are five seasons: Spring, Summer, Peach season, and Fall. And it is Peach season right now! There is a time right between Summer and Fall where all the fruit ripens, but peaches tend to overtake any of the other fruits produced on my "mini" farm. And then we get too many peaches, and don't have enough recipes to use them all! During Peach season we have buckets all around the house just filled with peaches ready to be used. And we can never use them all, even when we give them away! This is also the time of year where we eat peaches with almost everything, and all the peaches we dont use go to the chickens. Even then we can't get rid of them fast enough!
So what do I do? I go on Pinterest and find recipes where I can use peaches. And, surprisingly, most of the peach recipes are pies or cobblers, with the occasional peach smoothie or peach ice cream. This time I found a peach cobbler that looked pretty tasty, and adapted the recipe from the original recipe found here. And man is it amazing!! The whole family will love this recipe, and it is one that will be made until we are sick of it! I have even taken this recipe to share with other families too, and even they loved it. So, if you experience Peach season in your household like I do, this will definitely be a recipe to try! This recipe is as easy as 1-2-3! And (as a bonus) this recipe makes the house smell absolutely wonderful.
 First you will need some ripe peaches! I would recommend 4-8 peaches depending on the size. These beauties came off a dwarf peach tree in my backyard! We would have left them on to ripen longer, except KD kept tearing them off and eating them as a snack. Everyone loves their peaches in this family!
 Then you are going to want to dice up your peaches. You can also cut them into slices, whatever your preference might be. Don't forget to de-skin them too, nothing is more unpleasant then trying to bite into your cobbler just to find a nasty skin.
 Then you will toss your peaches in a very large bowl with all the ingredients in part one. And yes, you will need a very very large bowl, since you will have a lot of peaches. Then pour that whole mixture into a 2 quart pan, and bake for 10 minutes.
While your peaches are cooking, it's time to make your topping. Stir the dry ingredients together, then mix in the butter, and then save the water to add in last. When your peaches are done, coat them in the topping right away. Try to spread it out as much as possible, but it's not a big deal if you can't.
 And then bake your whole confection for 30 minutes. If it is not done by then, then bake it until it has a nice golden brown color to it. Sprinkle some cinnamon-sugar on top, and then you are ready to go! This is definitely best served warm, but it tastes just as good either way.

So what do I do? I go on Pinterest and find recipes where I can use peaches. And, surprisingly, most of the peach recipes are pies or cobblers, with the occasional peach smoothie or peach ice cream. This time I found a peach cobbler that looked pretty tasty, and adapted the recipe from the original recipe found here. And man is it amazing!! The whole family will love this recipe, and it is one that will be made until we are sick of it! I have even taken this recipe to share with other families too, and even they loved it. So, if you experience Peach season in your household like I do, this will definitely be a recipe to try! This recipe is as easy as 1-2-3! And (as a bonus) this recipe makes the house smell absolutely wonderful.


While your peaches are cooking, it's time to make your topping. Stir the dry ingredients together, then mix in the butter, and then save the water to add in last. When your peaches are done, coat them in the topping right away. Try to spread it out as much as possible, but it's not a big deal if you can't.


Recipe:
Part One (Peaches)
4-8 Peaches, peeled and diced
1/4 cup White Sugar
1/4 cup Brown Sugar
1/4 teaspoon Cinnamon
Pinch of Nutmeg
1 teaspoon Lemon Juice
2 teaspoons Cornstarch
Part Two (Topping)
1 cup Flour
1/4 cup White Sugar
1/4 cup Brown Sugar
1 teaspoon Baking Powder
1/2 teaspoon Salt
6 tablespoons Butter, soft and cut into pieces
1/4 cup Boiling Water
Part Three (Cinnamon-Sugar)
3 tablespoons White Sugar
3 tablespoons White Sugar
1 teaspoon Cinnamon
1. Preheat over to 400 degrees F
2. In a large bowl, combine peaches with the rest of part one in a large bowl and mix until the peaches are well coated. Pour into a 2 quart baking dish (un-greased) and bake in preheated oven for 10 minutes.
3. In a different bowl, combine all the dry ingredients in part two. Then blend in the butter until it resembles coarse meal. Stir in the water until just combined.
4. Drop spoonfuls of the topping over the peaches while still hot. Try and cover the peaches as much as possible. Then, sprinkle with the cinnamon-sugar before replacing peaches in the oven. Bake for 30 minutes, or until the top has a nice golden-brown color.
note: This is best served warm! It can be heated in the microwave, and be kept for up to a week(if it doesn't get eaten within the first few days)
Have you tried this recipe? Tell me down below in the comments!
Subscribe to:
Comments (Atom)