
Showing posts with label Chocolate. Show all posts
Showing posts with label Chocolate. Show all posts
Wednesday, June 25, 2014
S'mores Brownies
As a popular camping dessert, why not bring the s'mores to the kitchen? Sure, there are a heckuva lot of s'mores recipes, but I would say this one is by far the best. It has the sweetness of the chocolate, the crunch of the graham crackers, and even the gooey-ness of the marshmallows! And, knowing me, I looove me some marshmallows! An added bonus to this recipe is that is another of the easy 1-2-3's that are loved by the whole family!

Friday, June 6, 2014
COBB (aka Slutty Brownies)
First of all, finding a non "vulgur" name for these brownies is hard, the name just fits so dang well! So after a whole day of thinking in my head, I came up with COBB. The Cookie Oreo Brownie Brownie. Or, for short, the slutty brownies. And oh my goodness the name fits well!! It is a whole boatload of sugar and you may or may not need water or milk to get the sweetness out of your mouth. Nonetheless, they are absolutely incredible!

And the best thing about this recipe? It only takes three steps~
Friday, May 23, 2014
Almond Joy cookies
Two recipes in one week? Bonus! This time I took the Perfect Cookie Base recipe from Cookies and Cups and mixed in my favorite candy, Almond Joy. Almost any chocolate should work for this recipe, but if the candy you are using is bigger than the average chocolate chunk, it should be cut up or crumbled before being folded into the batter. Anyways, these cookies turned out really amazingly, and my family just couldn't stop eating them!

Monday, May 12, 2014
Peanut Butter Butterscotch Cookies
It is almost the end of the school year, which means last minute college stuff and finals to take at school. It just so happened, one of my AP tests landed on the day I was supposed to bake in my culinary class sooo my "make-up lab" just ended up being this weeks recipe! This one is a recipe my teacher has had for many years, so there is not really an original recipe here on the internet. I will admit, I was a little skeptical about this recipe at first, because I did not think that Peanut Butter and Butterscotch would go well together. But today I was proved wrong!

Monday, May 5, 2014
Strawberries and Cream Cookies
Spring is here, and what better way to celebrate it than with a cookie with strawberries in it! The strawberries are not fresh, but they are just as amazing anyways. They also add a little pop of color, otherwise these would just be white chocolate chip cookies!

Monday, April 21, 2014
Chocolate Sugar Cookies
Sorry for the hiatus, I was just on spring break and the the week after is always quite hectic! But now that the hype has all died down people have been asking about when the next time I'll bake is, and today is the day! These little guys will be going to school and tested to see if this is a keeper recipe or not. Personally, I think they are very well done with a very brownie-like taste....it's just so much chocolate!!

Monday, March 17, 2014
Lava Chocolate Chip Cookies
You know that feeling where you bite into a warm chocolate chip cookie, and just by chance you bite into the middle of a chocolate chip? You know, the one that fills your mouth with warm, silky smooth chocolate that makes you want to stay in that moment, right then and right there? Well that is the exact thing you will experience as soon as you bite into this cookie. I mean, of course you can still bite into a warm chocolate chip, but the middle is where the party is at!

Sunday, February 2, 2014
Hot Chocolate Cookies
So I have had the pleasure to get some snow today....well, some snow at least. At this point, anything is better than nothing! I just wish that it was sticking to the ground, making snow angels and snowmen are definitely fun!
 Either way, snow and cold must mean only one thing... HOT CHOCOLATE!! I absolutely looove hot cocoa, and will make almost any excuse in order the drink it! Well, I stumbled across this recipe on the Pinterest cookies page, and knew that I would need an excuse to make these cookies (as well as a cup of hot cocoa to drink). The sad part is, I had to sacrifice my highly coveted marshmallows stash...but these cookies were definitely worth it!
Tuesday, January 28, 2014
Ice Cream Sundae Cookies
So when I come across this cookie recipe on Cookies and Cups that is the essence of ice cream in a cookie, of course I had to try it out! and ohmygoodness they are amazing! I would have used M&Ms if I had them, but I didn't so I used chocolate chip cookies instead. It just makes it so it has more of a chocolate chip taste to it, until you get a bite into the crisp waffle cone and get reminded that this is an ice cream cookie recipe!

Tuesday, November 12, 2013
Cranberry Bliss Cookies
So, if you are a regular Starbucks fan (as I am) then you know that with the holiday season comes not only Pumpkin Spice Lattes, but also the amazing delectable Cranberry Bliss Bars. Mhmm those things are what I live for around this time of year! Well that, and the snow, which never seems to want to fall where I live. Bummer!! At least the weather is cold enough to sit by the fire and drink Hot Chocolate!
Also, this time of year is when my Culinary Class starts selling cookbooks. And this year they are completely new design with new recipes that have been collected from all culinary educated throughout the entire United States. One of the books is about entrees appetizers, with a few desserts; while the other one is all about the holidays and includes both baking and crafts in it. Flipping through both of the books, I finally found a recipe called "Cranberry Hollybrook" in the holidays cookbook. I have no idea what a hollybrook is, but after making and tasting these cookies, I realize it is just a Cranberry Bliss Bar disguised as a cookie! A bonus to these cookies is the holiday colors...as well as the wonderful smells that will fill your house!

Also, this time of year is when my Culinary Class starts selling cookbooks. And this year they are completely new design with new recipes that have been collected from all culinary educated throughout the entire United States. One of the books is about entrees appetizers, with a few desserts; while the other one is all about the holidays and includes both baking and crafts in it. Flipping through both of the books, I finally found a recipe called "Cranberry Hollybrook" in the holidays cookbook. I have no idea what a hollybrook is, but after making and tasting these cookies, I realize it is just a Cranberry Bliss Bar disguised as a cookie! A bonus to these cookies is the holiday colors...as well as the wonderful smells that will fill your house!

Thursday, October 24, 2013
Oreo Stuffed Chocolate Chip Cookies
So I have definitely made this recipe before, and everyone I know loved it! It combines our basic chocolate chip cookie with any kind of oreo, based upon your preference Every time I go to school with these they all sell out, no matter what the price is. They are super sweet too, I definitely know I can't eat more than two of these, still gooey, right out of the oven. Ugh I want to make them again just thinking about it! And you can use any type of oreos as well, I just use the Double-Stuf Oreos so people get the most bang out of their buck.
Other than trying to bake for school on a daily basis, school is going fine. I got my progress report and got great grades, which I am totally happy about! Also, we get Friday (10.25) off as a holiday! This weekend I have a Halloween Party at a friends house, and then just helping clean up around my own for the ritual weekend cleaning. Soo much fun!! Not. And I won't get to bake for three days either, because I rarely bake for home since my family doesn't eat what I make. Oh well, I know everyone at school will!
Back to the baking. I found this recipe after my friends would not stop bugging me about it! So I searched and I searched for a recipe that would suit my needs, then I stumbled upon a website called Tablespoon, and found this recipe there. Now, the recipe on the site says that this makes 2 dozen cookies, but it all depends on how much dough you encase the oreo in. I make mine a little thicker around the oreo, but thats only because I use Double-Stuf Oreos.

Other than trying to bake for school on a daily basis, school is going fine. I got my progress report and got great grades, which I am totally happy about! Also, we get Friday (10.25) off as a holiday! This weekend I have a Halloween Party at a friends house, and then just helping clean up around my own for the ritual weekend cleaning. Soo much fun!! Not. And I won't get to bake for three days either, because I rarely bake for home since my family doesn't eat what I make. Oh well, I know everyone at school will!
Back to the baking. I found this recipe after my friends would not stop bugging me about it! So I searched and I searched for a recipe that would suit my needs, then I stumbled upon a website called Tablespoon, and found this recipe there. Now, the recipe on the site says that this makes 2 dozen cookies, but it all depends on how much dough you encase the oreo in. I make mine a little thicker around the oreo, but thats only because I use Double-Stuf Oreos.

Thursday, September 26, 2013
Scraps Cookies
Alright, so these cookies definitely have many names. The can be called Garbage Cookies or Everything but the kitchen sink, as well as a 'nicer' and 'cleaner' name, Scrap Cookies. They get their name from there ingredients, which really can be anything. I mean, this is the cookie where you can put in any leftover ingredients from previous baking jobs, and it will still taste fabulous! There is definitely no set recipe for this past the actual dough preparation, so go ahead and be creative!
I originally received this recipe through a client of mine. Over the summer I catered for the first leg of her daughters Bat Mitzpha, and she provided the recipes. I also prepared lemon bars, carmelita bars, and my favorite, M&M cookies. All were fabulous, and the job ended well! Now these recipes sit in my notebook, waiting to again be picked up and shared to the goodness of the world. Hang on people, you will see them soon!


I originally received this recipe through a client of mine. Over the summer I catered for the first leg of her daughters Bat Mitzpha, and she provided the recipes. I also prepared lemon bars, carmelita bars, and my favorite, M&M cookies. All were fabulous, and the job ended well! Now these recipes sit in my notebook, waiting to again be picked up and shared to the goodness of the world. Hang on people, you will see them soon!

These are the ingredients I blended into my batter. As you can see, I have: pretzels, oats, coconut, craisins, assorted nuts, and chocolate chips. You can also add in Rice Krispies cereal for a bit of crunch, or a specific nut if you only like certain kinds. And each of these ingredients are easily removable as well, especially since not everyone always like whats in a certain cookie. It's also easy to mix in any other items you can find laying around the kitchen, waiting to be used, so be creative! Oooh you can even make a Candy Scraps cookie with little candy pieces I might have to try that for Halloween, so be on the lookout for a recipe!

Then, after you combine the ingredients with the dough, drop them onto an un-greased baking sheet. You can roll them into balls if you like, these are one of the cookies that actually holds their shape while baking. Either way, these cookies will come out fluffy and full of flavor once out of the oven. Mmmmm, they are best right out of the oven, when everything is still gooey and falling apart! Yum!

RECIPE:
INGREDIENTS:
1 cup Shortening (or Margarine)
1 cup Brown Sugar
2 Eggs
1 tsp Vanilla
2 cups Flour
1 tsp Baking Soda
1/2 tsp Baking Powder
1 tsp Salt
2 cups Oatmeal
1 cup Coconut, shredded
1/4 cup Assorted Nuts
12 oz bag Chocolate Chips
1 cup Craisins
1/4 cup Pretzels
Instructions:
1. Preheat oven to 350 degrees F.
2. In a large bowl, mix together the shortening, brown sugar, eggs, and vanilla. Set aside.
3. In a medium bowl, mix up the remaining ingredients. Then combine with the dough and mix until everything is well incorporated.
4. Drop balls of prepared dough onto an un-greased baking pan, then cook for 10-15 minutes, or until the edges have a golden brown color. Cool and enjoy!
Try this recipe? Tell me how it went down below in the comments!
Wednesday, September 18, 2013
Salted Caramel Chocolate Chip Cookie Bars
I am definitely liking my caramel this week!! Although this time, instead of Hershey's kisses, I used caramel topping. You know, the caramel stuff you put on top of ice cream to make some caramel sundaes? Yeah, that's what I used in this recipe, since I didn't have any caramel chips and heavy cream on hand. I have to admit, it still tasted pretty good though! I sold these bars at school for $1 apiece, and even the students enjoyed them! They may not look like much at first, but that first bite will take you to a whole new realm of flavor. The salt balances well with the chocolate and caramel, as long as you don't go too overboard on it.


This recipe is adapted from Blahnik Baker, which takes absolutely amazing pictures and always has good recipes to try! I discovered this site through Pinterest, and it is absolutely gorgeous. Maybe some day my blog will look as good as that, but that itself is its own dream. For now, focus on school! But I took this recipe and followed it pretty closely up until the caramel part. I used Caramel topping (Smackers brand) instead of the caramel chips and heavy cream. The end results look different, but they still taste amazing!

So I mixed the dough, then placed half of it in this Pam-sprayed 8x8 pan. Then I poured some of the Caramel topping on the top and spread it with a spatula. Make sure it is an even coat, but you can add as much or as little caramel as you want. After you are done pouring the caramel, sprinkle your salt over the top. Table salt works fine if you don't have sea salt for this part.

This is what my pan looked like after I placed the remainder of the cookie dough over the caramel. You can try to spread it around with a spatula, not push down too hard or the caramel will integrate with the cookie dough. I also sprinkle this layer with salt, so that there will be the saltiness throughout each bar.

Just stick them in the oven for 30 minutes, and you're done! You can see that the caramel did integrate with the cookie dough a little bit, but that was probably because I put a lot of salt on it. Either way, they taste amazing and have a cool marble look to it. They are easiest to cut after a few hours when they have cooled a bit, or if you are super excited to eat them (as I was), then you just need to grad a fork, it's going to be goey!

Recipe:
Adapted from Blahnik BakerINGREDIENTS:
2 1/8 cups Flour
1/2 teaspoon Salt
1/2 Teaspoon Baking Soda
3/4 cup Butter, melted and cooled
1 cup Light Brown Sugar
1/2 cup Sugar
1 large Egg, room temperature
1 large Egg Yolk, room temperature
2 teaspoons Vanilla
2 cups Chocolate Chips
Smackers Caramel Dessert Topping
Sea Salt, preferred, for sprinkling (table salt works fine too)
DIRECTIONS:
1. Preheat oven to 350 degrees F. Spray an 8x8 pan or line with parchment paper(leaving an overhang). If using parchment paper, spray that with nonstick spray as well.
2. In a large bowl, which together flour, salt, and baking soda. Set aside.
3. In another large bowl combine the butter with both sugars until combined. Add in the egg, egg yolk, and vanilla extract and beat until smooth. Slowly stir in the cry ingredients until just combined. The stir in the chocolate chips.
4. Pour half of the batter in your prepared pan. Cover with a layer of Caramel sauce, then sprinkle the salt over that. Then, drop the remaining cookie dough over the top of the caramel and smooth with a spatula. Sprinkle with salt again.
5. Bake for 30-40 minutes, or until a the edges are a light brown color and peel away from the sides of the pan. Cool completely before cutting.
Try this recipe? Tell me how it went down below in the comments!
Tuesday, September 17, 2013
Caramel Chocolate Chip Cookies
Fall is almost upon us! And with this new season comes the flood of pumpkin recipes, sweatshirts, and (yes) even yoga pants. This is definitely the best time of the year to bake since there are soo many different recipes, and baking is also the quickest way to warm up the house!!
So with this fall season, I wanted to try some different recipes. And I have definitely had a hankering for caramel lately, so I visited Pinterest and found this Milky Way Salted Caramel Cookie recipe! So, of course, I was super excited and went down to the store to get some candy, and guess what. Guess what. They were completely out. All of Walmart was out of the Caramel Milky way, and I was thinking what now? Now I dont have a fancy smartphone so I couldn't just look for a recipe to create, and I really didn't want to go back to Walmart again, then BING! An Idea came to me! Why can't I buy Hershey's Caramel Kisses and bake them inside my Chocolate Chip Cookie recipe? So that is what I did, and here is my wonderful journey to a happy tummy!

Yay for Caramel Kisses!! I saw these candies and came up with the recipe immediately And I sure was glad I did, they turned out amazing! So first this first is that you are going to want to create the basic chocolate chip cookie batter, which you can find here.

Then you will take the dough from the basic recipe and roll into little balls encasing the kisses. It is fairly easy to do, and if the dough isn't cooperating, just add some more flour to it. Not a lot, but enough to make the dough tangible. It always comes out different fr me, so there is definitely no set measurements for extra flour. Make sure they are covered all the way, although the tip can stick out a little bit, it isn't a big deal.

See! All closed into it's own little ball. Drop onto ungreased pans about 2 inches apart, they will spread but not too much. The more baking soda you put into the basic recipe, the more it will spread.

Then when they are all covered and ready to bake, stick them in the oven!! They bake for the same time as a normal chocolate chip recipe. And if you happen to look in the oven periodically and see that the cookie looks flat while the Hershey stands tall, don't worry; it will all even out in it's own time.

Recipe:
INGREDIENTS
Prepared cookie dough~ I use this recipe
1 package Caramel Hershey Kisses
DIRECTIONS:
1. Preheat oven to 350. Take prepared cookie dough and roll in a ball, encasing the Caramel Kiss completely.
2. Drop onto un-greased cookie sheet, and bake for 8-10 minutes, or until the edges are a light brown.
That's It!
Try this recipe? Tell me how it went down below in the comments!
Sunday, August 18, 2013
Chocolate Chip Cookies!
Well, the start of the school year also signifies the start of me selling again! Some kids sell drugs or test answers, but I sell all the things I bake! At the beginning of the year I am usually just baking on Sundays, then selling throughout the week. But, when business picks up, I can be baking anywhere from 1-3 times a week. Sounds exhausting to some, but I love doing it! And after High School I am hoping to pursue a career in baking and pastries, maybe even catering!
Oh yeah, more exciting news! I was offered by the owner of Never Enough Ballroom to cater for on the weekends! On Saturdays they offer free dance classes, which you can read more about on their website here. It is truly a fun thing to do, and is fun for the whole family as well! I am definitely thinking about taking that offer, good for experience!
Anyways, for this week in school I decided to start with something simple, something that will get business booming the way it was last year. Chocolate chip cookies! I mean, who doesn't love them? And they are also really super quick and easy as well, so I won't be spending too much time on something if people end up not liking them. If they don't, more for my family! This recipe I found here on the allrecipes.com website!
Note: I ran out of chocolate chips, so I cut up some bakers chocolate, which is why my cookies are so speckled.

First things first, get all your ingredients! I will have a list below of all the things you need, but you may already have them in the kitchen! Then you will want to combine the butter with both sugars. Beat in the eggs one at a time, and well incorporate them. Don't forget the vanilla! And the baking soda too, as well as the salt. Can't make good cookies if you are missing the ingredients!

The flour and chocolate chips might be important to. Well, might be! Actually, no, they are very important and you can't make good chocolate chip cookies without the flour and chocolate chips! Mix mix mix, get it all blended together nicely. I might be crazy, but mixing everything together is my favorite part! The flour might be a little tricky, so I usually mix in the flour 1 cup at a time. Just a helpful tip!

Then just drop them on that cookie sheet! The website says you don't need to grease the pan, but you definitely need to! Oh, and my pan isn't dirty, Macy just burned it trying to make garlic bread. But that is for another day! I spray my hands with Pam and roll the dough into little balls too, people won't buy if your food doesn't look good! I mean, you don't have to do that, it is all based on your preference.
Then stick that pan in the oven and you are a free agent for all of 10 minutes! Woohoo!! Better than no time I guess! This is the time I use to clean up, then just sit down and relax as the cookie smell makes itself known around the house. Mmm the smell reminds me of holiday baking. So many good memories there! I absolutely love baking, but the holidays are the best, that is when you get to make all the tasty treats with peppermint. Pumpkin too! I actually have a pumpkin bread mix, I would say watch out for that one since it is coming soon! Ding Ding that is the timer, better get them out before those burn too!
 |
| Don't they look beautiful? |
Recipe: *Makes about 4 dozen*
1 cup Butter, soft
1 cup White sugar
1 cup Brown sugar, packed
2 Eggs
2 teaspoons Vanilla Extract
3 cups All-Purpose Flour
1 teaspoon Baking Soda
2 teaspoons Hot Water
1/2 teaspoon Salt
2 cups Chocolate Chips (and kind is fine)
1 cup Chopped Walnuts (optional)
1. Preheat oven to 350˚ and grease a cookie sheet.
2. Combine butter and both sugars. Beat in each egg, one at a time, until well incorporated. Stir in vanilla.
3. Dissolve the baking soda in the hot water, then add to the batter along with the salt. Stir in the flour, chocolate chips, and walnuts (optional).
4. Drop dough by the spoonful onto your cookie sheet. Bake 8-10 minutes, or until the edges are nicely browned. Cool and enjoy!
Try this recipe? Tell me how it went down below in the comments!
Wednesday, July 31, 2013
Brownie-Cookie Bars
 Here I am, baking again! Actually, that shouldn't really surprise anyone, I love to bake. Baking is my one get away from reality, when I don't have any new books to read. I also felt like my father should get a sweet treat after his long flight home from India, and what a sweet treat this is! I actually did not follow a recipe time, I just threw two things together and hoped for the best. I have made Brownie-Cookie Dough Bars, so it is basically the same idea. And, I'll admit, I did use a box brownie mix, and only because my attempts at making brownies from scratch failed. Multiple times. They just come out too crumby! Besides, I am all out of cocoa powder from make the brownie in a mug for my sister, Macy. Boy does she love those!
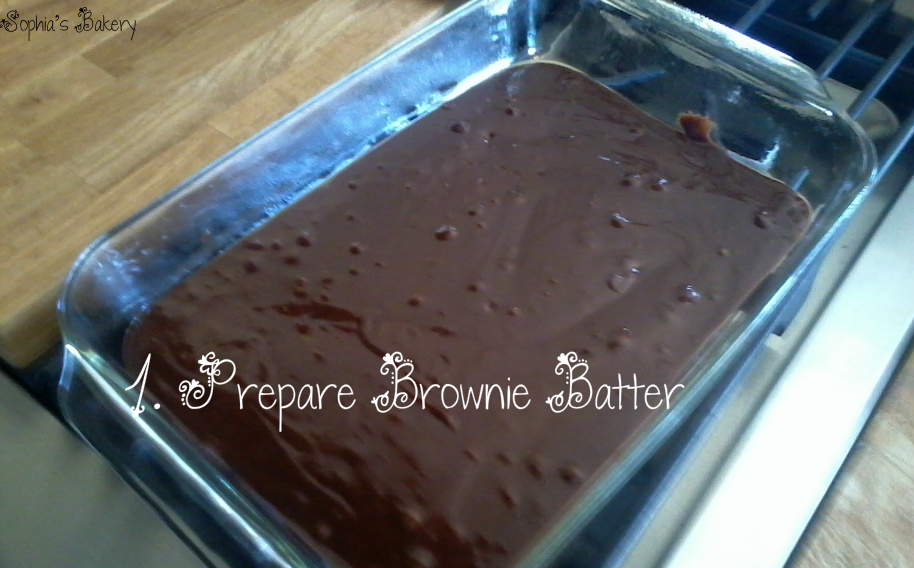

Bake for 40 minutes and viola! You have made yourself some amazing brownies!

Recipe:
1 box Brownie Mix, prepared
1 box Cookie Mix, prepared
1. Preheat oven to 350˚ and grease a 9x13 pan. You can also line with parchment paper
2. Spread the prepared brownie batter so that it is evenly distributed within the pan. Then drop spoonfuls of the prepared cookie dough on top.
3. Bake for 40 minutes or until a toothpick comes out clean.
* Cool completely before cutting*
What did I do with the remaining cookie dough? Make cookies of course! Just follow baking instructions for the cookies, which normally cook for 8-10 minutes.
Try this recipe? Comment down below and tell me how it went!
Monday, July 22, 2013
Almond Joy Cookies
This time I have an actual recipe....that you can share with people! Because, sharing is caring right? Unless you are in my household, we definitely do not share well! Well, we don't share the super yummy foods, so someone always ends up getting more than the other person. Oh well, at least the food isn't going to waste! Actually, the food would never go to waste, it would go to my herd of chickens. That's right, I have somewhere around 30 (give or take a few) chickens, and they get all the leftovers that we do not eat! Which doesn't happen very often, my family is good about eating food!!
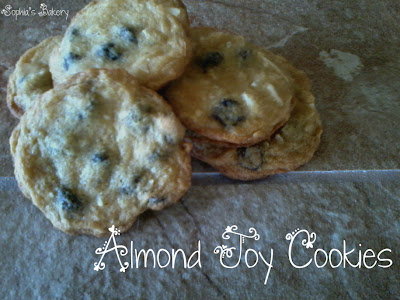
Alright, so these cookies are a twist off the favorite chocolate/almond candies, Almond Joy. I mean, who doesn't love the perfect chocolate/coconut to almond ratio? I know I do! And I had decided to make a cookie to honor the times when the candy cannot be found around the house (Bummer!). They are still amazing, and you can even drizzle chocolate over the tops of the cooled cookies if you are looking for that extra chocolate-y flavor. And I found this recipe on the back of a shredded coconut package. SCORE!
 (The Most Important thing is to) Grab all your ingredients out of the cabinet. I will have the full recipe below, with picture-steps for those that like visuals! You will need a large bowl, since this is a huge recipe!
Preheat your oven to 375˚ and grease your cookie sheet, or line with parchment paper. What ever works for you!
 Now, in a large bowl cream together your brown sugar, white sugar, and softened butter. The more it's mixed, the better!

Beat in your eggs one at a time. The dough might be a little water-y looking, but that's alright! That will get evened out later. I beat my egg with a spoon, but a fork would work and a whisk might too. I don't know, try new things!


Ingredients:
Alright, so these cookies are a twist off the favorite chocolate/almond candies, Almond Joy. I mean, who doesn't love the perfect chocolate/coconut to almond ratio? I know I do! And I had decided to make a cookie to honor the times when the candy cannot be found around the house (Bummer!). They are still amazing, and you can even drizzle chocolate over the tops of the cooled cookies if you are looking for that extra chocolate-y flavor. And I found this recipe on the back of a shredded coconut package. SCORE!

Preheat your oven to 375˚ and grease your cookie sheet, or line with parchment paper. What ever works for you!


Beat in your eggs one at a time. The dough might be a little water-y looking, but that's alright! That will get evened out later. I beat my egg with a spoon, but a fork would work and a whisk might too. I don't know, try new things!

After your eggs are well incorporated into your mixture, you are going to add in the vanilla! This part is easy, because all you have to do is stir it in.

The next hing you are going to do is add in the flour, baking soda, and salt. This is what will give the dough a more dough-like consistency. Stir until everything is combined. The dough will get thicker so make sure there aren't any hidden, flour-filled bubbles in your batter. If you have had that happen before, then you know what I'm talking about. If not...well, you do not want that!

And the final thing before baking....adding in all the good stuff! This is the part where you combine the coconut, chocolate chips, and almonds. Adding these things will not only give texture to your cookies, it also gives that almond joy taste that many love!
After everything is combined, drop by the spoonful onto the prepared sheet. Make sure to space them well, as they will spread out! Bake and enjoy(:

Finished product! Yumm ♡
Full Recipe:
Ingredients:
1/2 cup Butter, soft
3/4 cup White Sugar
3/4 cup Brown Sugar
2 Eggs
2 teaspoons Vanilla
2 1/4 cup Flour
1 tablespoon Baking Soda
1/2 teaspoon Salt
1 cup Coconut
1 cup Chocolate Chips
1 cup Almonds, Chopped
1. Preheat oven to 375˚ and grease a cookie sheet, or cover using parchment paper.
2. In a large bowl, cream together both sugars and the softened butter util creamy. Beat in the eggs, one at a time, then stir in the vanilla.
3. Stir in the flour, baking soda, and salt. Make sure everything is well incorporated.
4. Add in the coconut, chocolate chips, and almonds, stir until everything is evenly distributed.
5. Drop spoonfuls onto prepared cookie sheet. Bake for 6-10 minutes, or until the edges begin to brown. Cool and enjoy!
Did you try this recipe? Tell me how it went for you below in the comments!
Subscribe to:
Posts (Atom)