
Showing posts with label Brownie. Show all posts
Showing posts with label Brownie. Show all posts
Wednesday, June 25, 2014
S'mores Brownies
As a popular camping dessert, why not bring the s'mores to the kitchen? Sure, there are a heckuva lot of s'mores recipes, but I would say this one is by far the best. It has the sweetness of the chocolate, the crunch of the graham crackers, and even the gooey-ness of the marshmallows! And, knowing me, I looove me some marshmallows! An added bonus to this recipe is that is another of the easy 1-2-3's that are loved by the whole family!

Friday, June 6, 2014
COBB (aka Slutty Brownies)
First of all, finding a non "vulgur" name for these brownies is hard, the name just fits so dang well! So after a whole day of thinking in my head, I came up with COBB. The Cookie Oreo Brownie Brownie. Or, for short, the slutty brownies. And oh my goodness the name fits well!! It is a whole boatload of sugar and you may or may not need water or milk to get the sweetness out of your mouth. Nonetheless, they are absolutely incredible!

And the best thing about this recipe? It only takes three steps~
Monday, April 21, 2014
Chocolate Sugar Cookies
Sorry for the hiatus, I was just on spring break and the the week after is always quite hectic! But now that the hype has all died down people have been asking about when the next time I'll bake is, and today is the day! These little guys will be going to school and tested to see if this is a keeper recipe or not. Personally, I think they are very well done with a very brownie-like taste....it's just so much chocolate!!

Wednesday, September 18, 2013
Salted Caramel Chocolate Chip Cookie Bars
I am definitely liking my caramel this week!! Although this time, instead of Hershey's kisses, I used caramel topping. You know, the caramel stuff you put on top of ice cream to make some caramel sundaes? Yeah, that's what I used in this recipe, since I didn't have any caramel chips and heavy cream on hand. I have to admit, it still tasted pretty good though! I sold these bars at school for $1 apiece, and even the students enjoyed them! They may not look like much at first, but that first bite will take you to a whole new realm of flavor. The salt balances well with the chocolate and caramel, as long as you don't go too overboard on it.


This recipe is adapted from Blahnik Baker, which takes absolutely amazing pictures and always has good recipes to try! I discovered this site through Pinterest, and it is absolutely gorgeous. Maybe some day my blog will look as good as that, but that itself is its own dream. For now, focus on school! But I took this recipe and followed it pretty closely up until the caramel part. I used Caramel topping (Smackers brand) instead of the caramel chips and heavy cream. The end results look different, but they still taste amazing!

So I mixed the dough, then placed half of it in this Pam-sprayed 8x8 pan. Then I poured some of the Caramel topping on the top and spread it with a spatula. Make sure it is an even coat, but you can add as much or as little caramel as you want. After you are done pouring the caramel, sprinkle your salt over the top. Table salt works fine if you don't have sea salt for this part.

This is what my pan looked like after I placed the remainder of the cookie dough over the caramel. You can try to spread it around with a spatula, not push down too hard or the caramel will integrate with the cookie dough. I also sprinkle this layer with salt, so that there will be the saltiness throughout each bar.

Just stick them in the oven for 30 minutes, and you're done! You can see that the caramel did integrate with the cookie dough a little bit, but that was probably because I put a lot of salt on it. Either way, they taste amazing and have a cool marble look to it. They are easiest to cut after a few hours when they have cooled a bit, or if you are super excited to eat them (as I was), then you just need to grad a fork, it's going to be goey!

Recipe:
Adapted from Blahnik BakerINGREDIENTS:
2 1/8 cups Flour
1/2 teaspoon Salt
1/2 Teaspoon Baking Soda
3/4 cup Butter, melted and cooled
1 cup Light Brown Sugar
1/2 cup Sugar
1 large Egg, room temperature
1 large Egg Yolk, room temperature
2 teaspoons Vanilla
2 cups Chocolate Chips
Smackers Caramel Dessert Topping
Sea Salt, preferred, for sprinkling (table salt works fine too)
DIRECTIONS:
1. Preheat oven to 350 degrees F. Spray an 8x8 pan or line with parchment paper(leaving an overhang). If using parchment paper, spray that with nonstick spray as well.
2. In a large bowl, which together flour, salt, and baking soda. Set aside.
3. In another large bowl combine the butter with both sugars until combined. Add in the egg, egg yolk, and vanilla extract and beat until smooth. Slowly stir in the cry ingredients until just combined. The stir in the chocolate chips.
4. Pour half of the batter in your prepared pan. Cover with a layer of Caramel sauce, then sprinkle the salt over that. Then, drop the remaining cookie dough over the top of the caramel and smooth with a spatula. Sprinkle with salt again.
5. Bake for 30-40 minutes, or until a the edges are a light brown color and peel away from the sides of the pan. Cool completely before cutting.
Try this recipe? Tell me how it went down below in the comments!
Wednesday, July 31, 2013
Brownie-Cookie Bars
 Here I am, baking again! Actually, that shouldn't really surprise anyone, I love to bake. Baking is my one get away from reality, when I don't have any new books to read. I also felt like my father should get a sweet treat after his long flight home from India, and what a sweet treat this is! I actually did not follow a recipe time, I just threw two things together and hoped for the best. I have made Brownie-Cookie Dough Bars, so it is basically the same idea. And, I'll admit, I did use a box brownie mix, and only because my attempts at making brownies from scratch failed. Multiple times. They just come out too crumby! Besides, I am all out of cocoa powder from make the brownie in a mug for my sister, Macy. Boy does she love those!
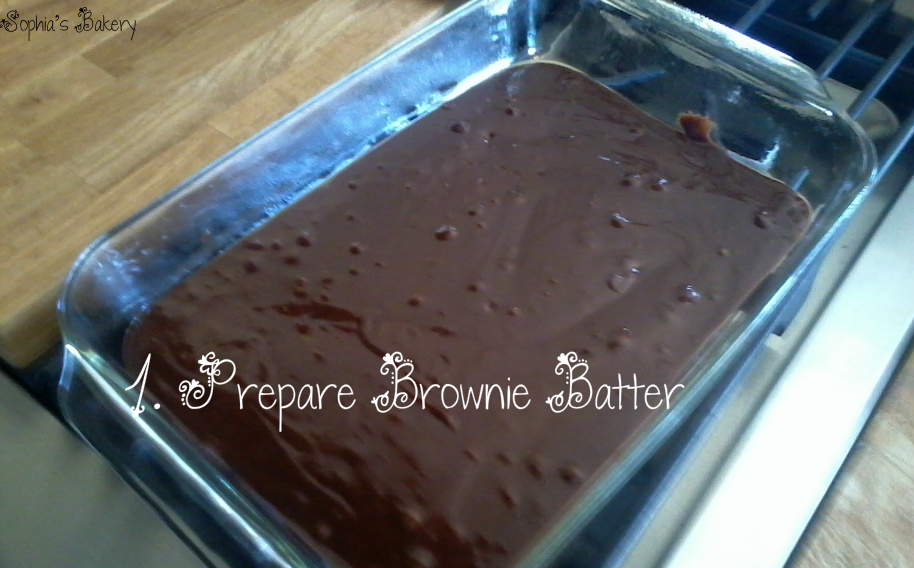

Bake for 40 minutes and viola! You have made yourself some amazing brownies!

Recipe:
1 box Brownie Mix, prepared
1 box Cookie Mix, prepared
1. Preheat oven to 350˚ and grease a 9x13 pan. You can also line with parchment paper
2. Spread the prepared brownie batter so that it is evenly distributed within the pan. Then drop spoonfuls of the prepared cookie dough on top.
3. Bake for 40 minutes or until a toothpick comes out clean.
* Cool completely before cutting*
What did I do with the remaining cookie dough? Make cookies of course! Just follow baking instructions for the cookies, which normally cook for 8-10 minutes.
Try this recipe? Comment down below and tell me how it went!
Wednesday, July 10, 2013
Brownie in A Mug

Anyways, this little cup is full of Brownie goodness! It is the perfect serving size, and quick to make too. It took me all of 5 (five!) minutes to make this delectable, and I am pretty proud of myself too!
Here's the recipe so you can try it too:
Recipe:
1/4 Cup Flour
Pinch of Salt
2 Tablespoons Vegetable Oil
2 Tablespoons Unsweetened Cocoa Powder
1/4 Cup Brown Sugar
2 Tablespoons Milk
1. Mix together all the dry ingredients into a coffee mug of your choice. Then add in the Milk and Vegetable oil, and mix until well incorporated.
2. Microwave the mug in 30 second increments, or until the top has set. It will be hot coming out of the microwave!! Enjoy!
This is my first post, so there are not many pictures. I am hoping to get more as I go along, as well as being able to write better posts as I get further along. Comment below if you tried this recipe!
Subscribe to:
Posts (Atom)